Shira Route -
A Beautiful & Rarely Used Route
Experience the beauty and challenge of Kilimanjaro on the exclusive Shira Route, perfect for adventurous climbers seeking breathtaking views and a quieter, more rewarding ascent.
For Quick Acclimatizers
Challenge Level
A More Exclusive Route
From
$2750
7 Days
56KM (33 Miles)
5,895M (19,340’)
What This Package Includes
What’s Included In The Price?
Large portions of fresh, healthy, nutritious food
Clean, purified drinking water
Quality mess tents with tables and chairs
VAT (18% charged by the government)
All transfers to and from the mountain and your Arusha hotel
2 nights hotel stay (1 night pre-summit and 1 night post-summit)
Access to guides’ phone numbers for any questions leading up to your climb
Professional, experienced mountain guides and bearers all the way
Guides, porters, and cook salaries included
Park fees (includes conservation fees, camping or hut fees, and rescue fees)
Emergency oxygen cylinder
Quality, waterproof, four-season mountain sleeping tents (twin sharing basis)
All meals provided while on the mountain
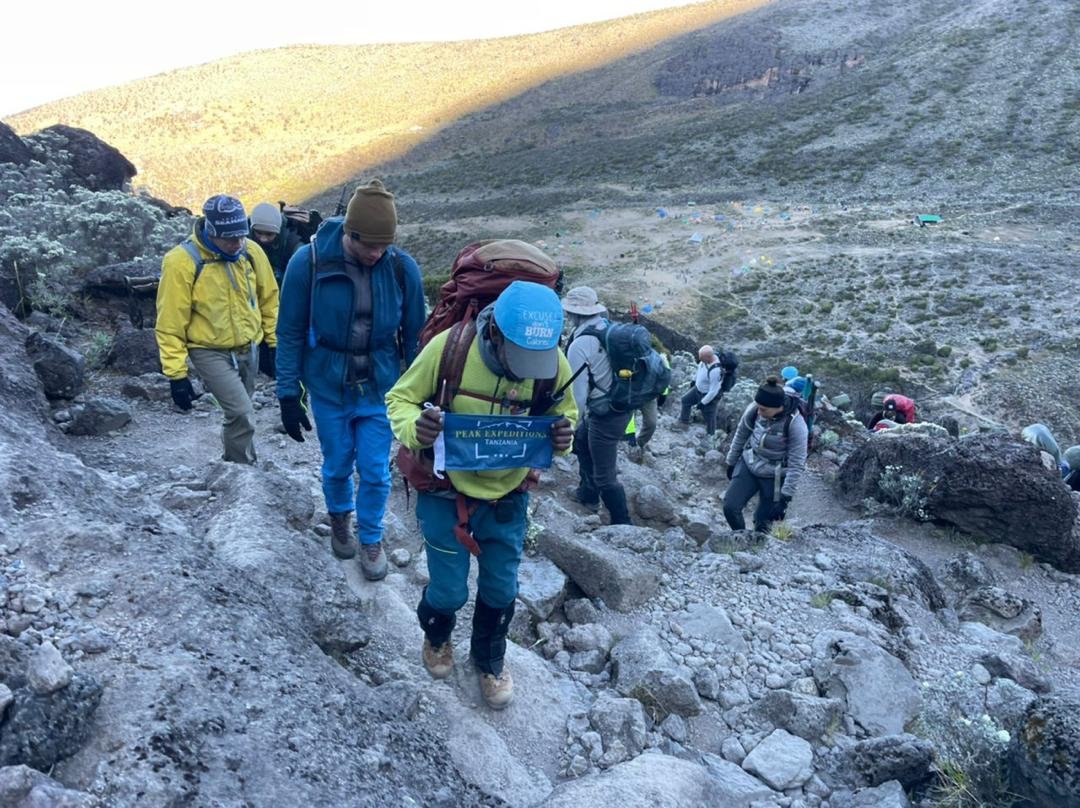
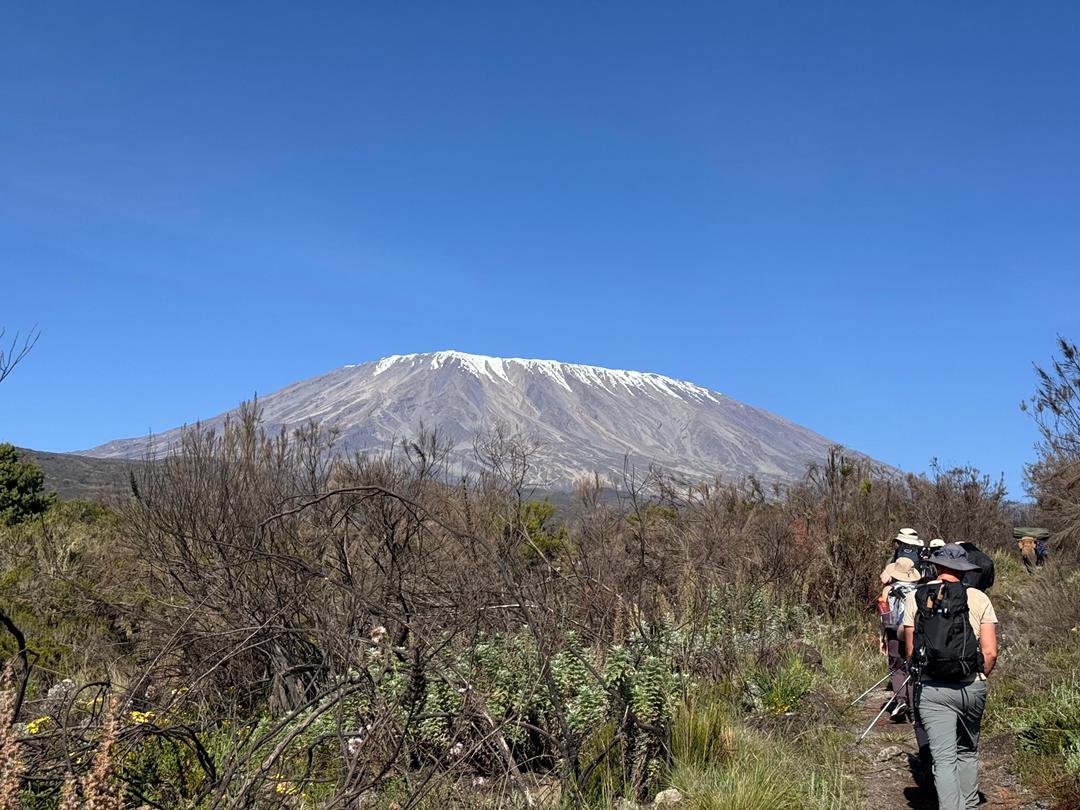
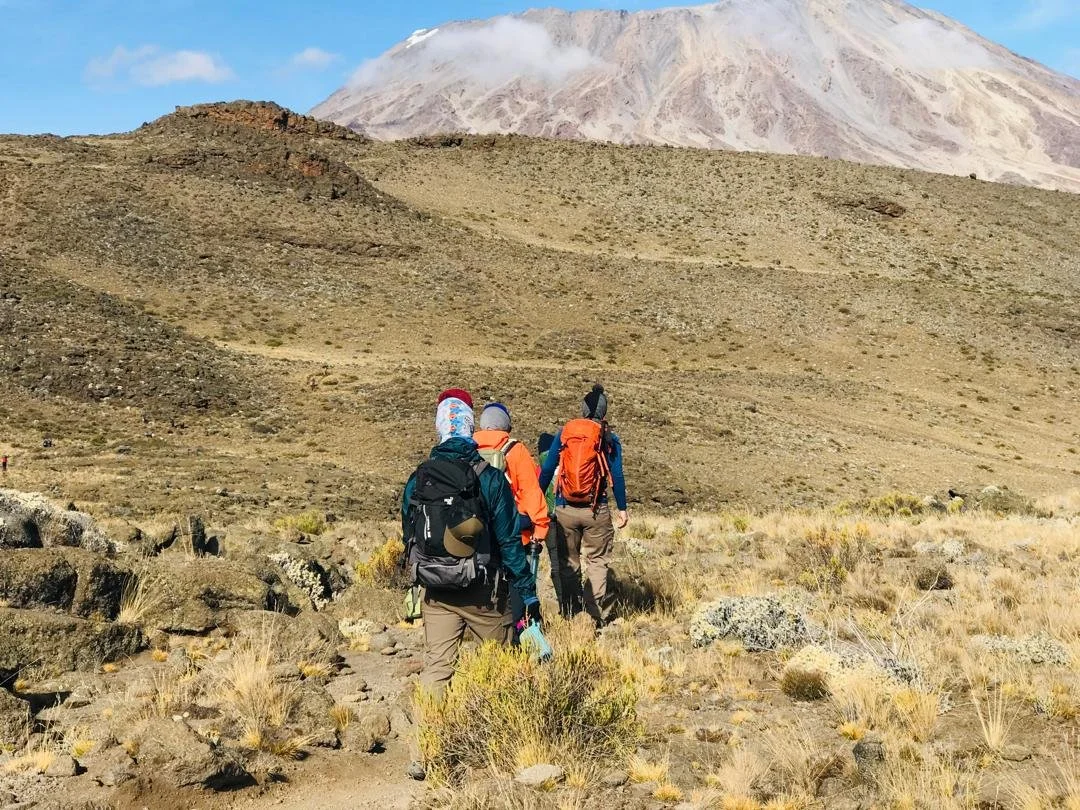
The Shira Route is a less frequently used trail that begins near Shira Ridge, offering a varied and beautiful approach to climbing Mount Kilimanjaro. However, it is not recommended for all climbers due to the high altitude of Shira’s starting point, which is accessed by vehicle. This can lead to altitude-related symptoms on the first day, so climbers should be confident in their ability to acclimatize quickly. The route approaches Mount Kilimanjaro from the west, beginning with a long drive from Arusha to Shira Ridge, bypassing the rain forest zone. The hike starts on Shira Ridge and crosses the entire Shira Plateau from west to east in a pleasant, relatively flat hike. From there, the route traverses underneath Kilimanjaro’s Southern Ice Field along the Southern Circuit before summiting from Barafu. The descent is made via the Mweka route, offering a comprehensive and scenic journey through diverse landscapes and ecosystems.
The Shira Route in Short
Why Choose This Route?
Exclusive and Less Crowded: The Shira Route offers a more private experience with fewer climbers, allowing for a peaceful and intimate ascent of Kilimanjaro.
Ideal for Quick Acclimatizers: Starting at a higher altitude, this route is perfect for climbers who can acclimatize quickly, offering a challenging yet rewarding trek.
Diverse Landscapes & Ecosystems: Journey through varied terrain, from open moorlands to volcanic ridgelines, experiencing the rich diversity of Kilimanjaro's ecosystems.
High Success Rate: With proper acclimatization, the Shira Route boasts a high summit success rate, giving climbers confidence in reaching the top.
All Of Our Climbs Include
All Park Fees & VAT
All Accomodations
All Transport - Including Airport Pick up & Drop off
Direct Access To Our Guides Before You Climb
All Meals While On Mountain - Fresh & Nutritious
Quality, waterproof, four-season mountain sleeping tents
Knowledgable & Experienced Guides, Porters & Chefs
Itinerary
From Kilimanjaro Airport To Your Hotel in Arusha
Upon landing at Kilimanjaro International Airport, you'll be warmly greeted by our guide and transferred to your hotel in Arusha, the diplomatic heart of East Africa. In the afternoon, you'll have a detailed briefing and a gear check to ensure you're fully prepared for the upcoming climb. Afterward, you can unwind and enjoy leisure activities at the hotel, with optional town trips available for an additional fee, as shown on the day. You'll spend the night in Arusha, resting up for the adventure ahead.
Accomodation:
Hotel
From The Hotel To Kilimanjaro National Park & Then Overnighting At Shira 1 Camp
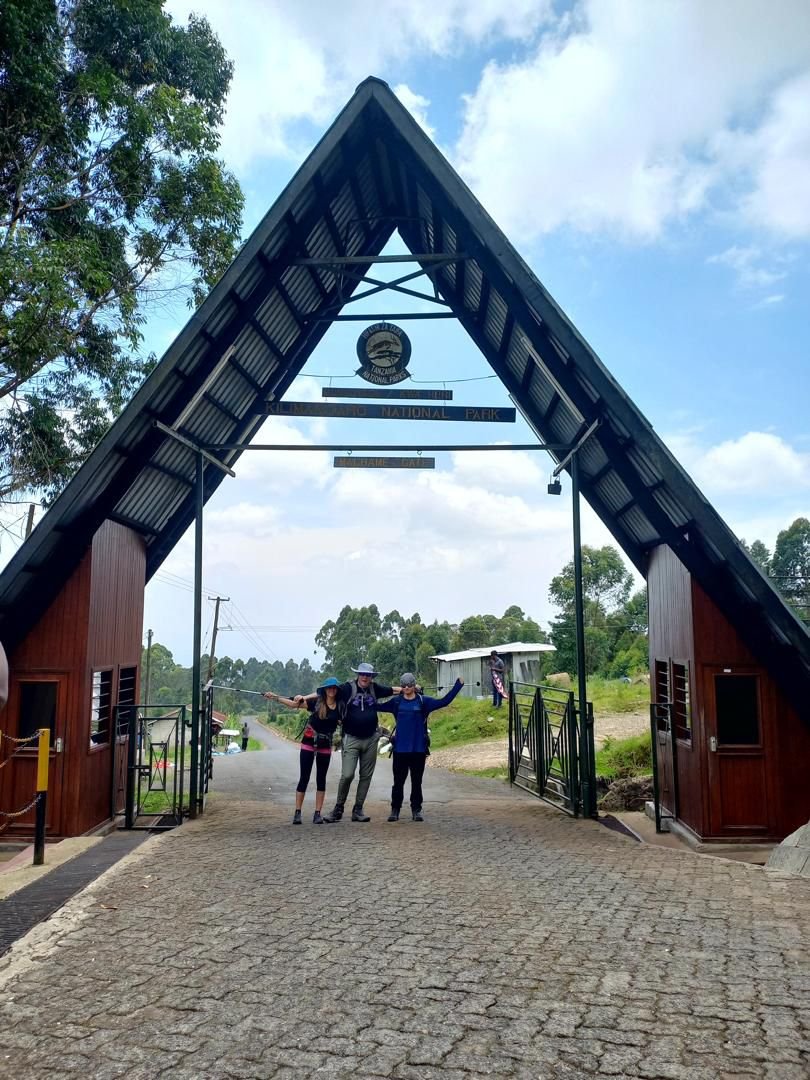
At Londorossi Gate, you'll complete the necessary entry formalities, which include registering with the park authorities and securing your permits. Meanwhile, your guides and porters will prepare the equipment for the journey ahead. Once formalities are completed, you’ll continue by vehicle along a steep path that leads to Shira Gate. This is where your hike begins, offering a gentle introduction as you trek through a landscape of shrubs and giant heather. The surroundings will give you a taste of the diverse ecosystems you'll experience on your journey up Mount Kilimanjaro.
Accomodation:
Tent
Londorossi Gate (2360m/7,742’)
Shira 1 Camp (3610m/11,844’)
Landmarks:
From Shira 1 Camp To Shira 2 Camp
After breakfast at Shira 1 Camp, you'll ascend towards Shira 2 Camp, passing through open landscapes and gaining altitude. The trek will take you across Shira Ridge, offering breathtaking views of the expansive Shira Caldera and the majestic Kibo Peak in the distance. As you settle in at Shira 2 Camp for the night, you'll be surrounded by the stillness of the plateau, with the possibility of hearing wildlife sounds as you rest under the stunning display of starry skies.
Accomodation:
Tent
Landmarks:
Shira 1 Camp (3610m/11,844’)
Shira 2 Camp (3850m/12,632’)
From Shira 2 Camp To Moir Hut Camp
You'll ascend to over 4,600 meters, passing the impressive Lava Tower, an ancient formation believed to have originated from a volcanic vent. This will be your first experience of the alpine zone, where plant life becomes minimal due to the altitude. Afterward, you'll descend to Barranco Camp, enjoying stunning views of Mount Meru and the Heim Glacier along the way. You'll spend the night at Barranco Camp, nestled in a beautiful valley, offering a serene resting spot after the day's challenging climb.
Tent
Accomodation:
Shira 2 Camp (3850m/11,844’)
Lava Tower (4,630m/15,190’)
Barranco Camp (3,976m/13,044’)
Landmarks:
From Barranco Camp To Karanga Camp
After breakfast, you'll tackle the Barranco Wall, a challenging but rewarding climb, before continuing on to Karanga Camp. The trek will take approximately 3 to 4 hours as you traverse the alpine desert, with its striking, barren landscapes. You'll spend the night at Karanga Camp, resting and preparing for the next stage of the journey.
Accomodation:
Tent
Barranco Camp (3,976m/13,044’)
Karanga Camp (3,995m/13,106’)
Landmarks:
From Karanga Camp To Barafu Camp
You'll ascend to Barafu Camp, completing the scenic South Circuit route. Once at camp, you'll prepare for the summit attempt, taking time to rest and dine while acclimatizing. You'll spend the night at Barafu Camp, with stunning views of the summit ahead, as you ready yourself for the final ascent.
Accomodation:
Tent
Landmarks:
Karanga Camp (3,995m/13,106’)
Barafu Camp (4673m/15,331’)
From Barafu Camp To The Summit (Uhuru Peak) Before Descending To Mweka Hut
You'll begin your pre-dawn summit attempt, heading first to Stella Point before continuing on to Uhuru Peak, the highest point in Africa. After reaching the summit, you'll start your descent to Mweka Camp, with a stop at Barafu for lunch and some rest. In the evening, you'll celebrate your final night on the mountain at Mweka Camp, reflecting on your incredible achievement.
Accomodation:
Tent
Barafu Camp (4673m/15,331’)
Stella Point (5756m/18,885’)
Uhuru Peak (5895m/19,341’)
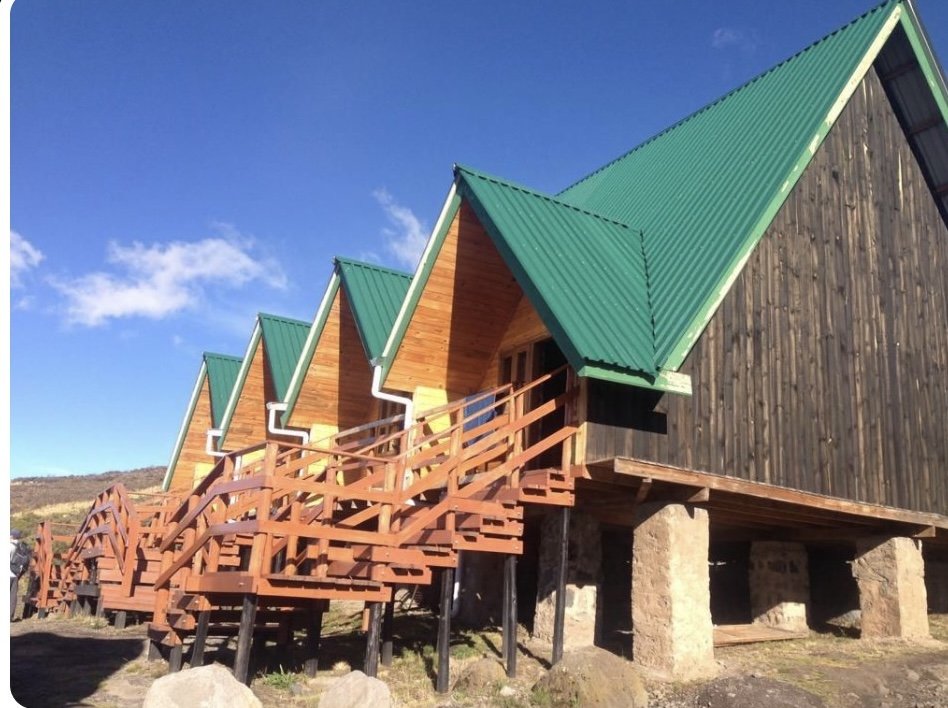
Mweka Hut Camp (3068m/ 10,065’)
Landmarks:
From Barafu Camp To The Summit (Uhuru Peak) Before Descending To Mweka Hut
After breakfast, you'll continue your descent to Mweka Park Gate, where you'll receive your summit certificates. The trail may be wet and muddy, so prepare for challenging conditions as you make your way down. You'll enjoy lunch at Mweka Gate before departing. After the trek, you'll return to your hotel for an overnight stay, where light, comfortable clothing is recommended for the warmer altitudes.
Accomodation:
Hotel
Mweka Hut Camp (3068m/ 10,065’)
Kilimanjaro National Park
Arusha City
Landmarks:
Arusha City To Kilimanjaro International Airport
You'll be transferred from your hotel in Arusha to Kilimanjaro International Airport, where your journey concludes. With heartfelt farewells, we’ll wish you a safe return home, carrying memories of your incredible adventure on Mount Kilimanjaro.
Landmarks:
Arusha City
Kilimanjaro International Airport
Trip Details
-
Difficulty
Shira route is very similar to Lemosho route, and the success rate of reaching the summit is equally high. As Shira route starts at a much higher point, it is highly recommended that only experienced hikers or those with the ability to quickly acclimatise follow this route.
Food & Drink
Maintaining a good diet is crucial during the climb, especially since high altitude can often cause a loss of appetite. Our head chef has crafted special menus that are both appealing and nutritious, ensuring you get the energy needed to reach the summit. Fresh fruits and vegetables are included daily. You will have fresh meat early in the trek, and we resupply at Karanga Camp on southern routes. After your summit ascent, you'll be rewarded with an “All Day English Breakfast” at Base Camp. Additionally, you'll get to taste local Tanzanian dishes like Njegere and Machalari before leaving the mountain.
Accommodation
Your day-by-day itinerary includes details of hotel accommodation and meal plans. Pre- and post-climb accommodations are in Arusha. Where hotels offer bed and breakfast, you can buy additional meals or snacks, payable in Tanzanian Shillings or US Dollars. Familiarize yourself with the hotel's layout and fire safety procedures upon arrival.
Be aware that Tanzania still experiences frequent water and electricity outages, and hot showers at the hotel are not guaranteed. On the mountain, we provide high-altitude tents, Mountain Hardwear Trango 3, designed for extreme conditions. Expect to use a separate mess tent for meals, equipped with a table and comfortable chairs. We also provide a toilet tent with toilet paper.
Transport
We use high-standard vehicles and drivers for all transfers. Although seatbelts in the back are not legally required in Tanzania, we strive to use vehicles with them whenever possible. If you're concerned about the vehicle or driving standards, please speak to the driver or our local office. It's common for police to stop vehicles for checks; this is routine and not a reflection on your driver or vehicle.
Luggage
Climbing Bag Weight
Kilimanjaro National Park strictly enforces a 15kg limit per porter for your main equipment bag, which includes your sleeping bag. This limit is sufficient for your mountain needs, and your bag will be weighed before the climb. Overweight bags will require you to remove items and leave them at the hotel. Additional porters can be hired at $25 per day.
Plastic Bag Ban
Since June 1, 2019, Tanzania has banned single-use plastic bags. Support this initiative by using sustainable alternatives like packing cubes and dry bags. Zip-lock bags for carrying liquids in cabin baggage are still permitted.
How Do I Get There?
For UK and US climbers, the best option is to fly to Kilimanjaro International Airport (JRO). KLM operates flights from major UK and US airports to JRO, usually via Amsterdam. Alternatively, some UK climbers fly to Nairobi and then transfer to JRO, though this route is less recommended due to potential delays and poor baggage handling at Nairobi Airport. Turkish Airlines, Emirates, and Qatar also offer flights to JRO, often preferred by US travelers.
Budget & Change
The Tanzanian Shilling is a closed currency, so bring US Dollars. US bills must be new, crisp, and untorn. Local currency can be accessed at ATMs or banks upon arrival. Notify your card issuer about international use to avoid issues. Not all hotels accept card payments, so have cash on hand.
Tips
In collaboration with the Kilimanjaro Porters Assistance Project (KPAP), we recommend tipping porters $6–$10 per day. Guides should receive $20 per day, assistant guides $12–$15 per day, and cooks $12–$15 per day. These tips are per group, not per climber. The final crew numbers and their roles will be confirmed on the first day of the climb.
During the summit attempt, additional porters, known as summit porters, may assist. An extra tip of $20 for these porters is appreciated. Tips are distributed on the last night on the mountain, at the final camp before reaching the exit gate. Envelopes are provided for this purpose.
Two porter representatives will receive the envelopes: one from Peak Expeditions Tanzania and one from the KPAP organization. This ensures transparency and the fair distribution of funds.
-
Passport
All travellers will need a passport which will remain valid for at least 6 months longer than your expected visit. You will also need to present proof that you have a return ticket, and proof that you have sufficient money to support yourself during your stay in Tanzania.
Each traveller is responsible for sorting out their own passport and visa requirements, and we cannot offer much assistance in this matter. If you do not yet have a passport, apply for one early, as they can take some time to arrive. If you already have a passport, double check when it expires.
Visa
While Tanzania is a Commonwealth country, UK citizens definitely do need a tourist visa to enter. This is also true for citizens of Australia, New Zealand, India, United States, Canada and most EU countries. Citizens of countries not mentioned should contact their nearest embassy or high commission to check visa requirements. Visas usually cost in the neighbourhood of USD50 (around GBP40), but some visas from the US can cost USD100. Tanzanian visas expire three months after they are issued, so be careful not to apply too soon.
Visas can be purchased upon arrival at Kilimanjaro international Airport (IATA code: JRO), but the immigration authority has recently changed the procedure and you can expect long queues, and for the process to take two hours or more. The Tanzanian High Commission has stressed that they have the right to deny visas applied for on arrival. We have never had a report of this happening, but it is a danger best avoided.
For these reasons, we highly recommend that travellers get their visa in advance if at all possible.
It is also now possible to apply for your Tanzania visa online. Please read the Visa Application Guidelines carefully before beginning your application to ensure you apply for the correct type of visa, and that you are planning on entering Tanzania through one of the approved entry points.
Where to obtain a Tanzanian visa?
- Any Tanzanian Embassy or High Commission
- The Tanzania Immigration Services website
- Entry points to Tanzania: Any gazetted entry point, including international airports.
- In Dar Es Salaam: The Office of the Director of Immigration Services
- In Zanzibar: The Office of the Principal Immigration Officer
Please be advised that, whilst we make every effort to provide you with accurate and up-to-date information, travel requirements can change quickly and sometimes without notice. We urge you to double check the visa and passport requirements for your trip, consult with an embassy or consulate, or use a reputable visa agency, such as www.thevisacompany.com.
Vaccinations
Below we have set out what is the general guidance for travel to Tanzania. We strongly advise you to consult with your own GP or travel clinic near you before travelling. They will have the most up to date and medically accurate information relevant to you, and should be relied upon over these recommendations.
Strongly Advised Vaccinations
- Hepatitis A: This can be spread via contaminated food and water.
- Tetanus: Tetanus is often present in the soil, and can contaminate open wounds easily. Tetanus vaccine should be used every ten years if travelling.
- Typhoid: Typhoid can also be spread via contaminated food and water, and poor hygiene.
- Diphtheria: This potentially fatal disease is spread mainly via spit, but occasionally through contact with cuts on the skin.
- Yellow Fever: This can be contracted by being bitten by a contaminated mosquito. This vaccination is not essential if you are arriving directly in Tanzania. You do need it though if you plan to arrive through any country that is subject to yellow fever. Simply stopping over at an airport in an affected country should not require vaccination, but leaving the airport even briefly would make it necessary
Sometimes Advised Vaccinations
- Hepatitis B: This illness is spread via contact with blood or bodily fluids. It is many, many times more virulent than HIV/AIDS. Some 8% of the population of Tanzania are believed to carry the virus.
- Rabies: Rabies is spread via contact between the saliva of any infected animal and an open wound (including bites, but also licking existing wounds). Rabies is fatal unless treated, and treatment of an unvaccinated rabies patient can be very difficult in many parts of Tanzania.
- Tuberculosis: TB is generally contracted through inhaling airborne sputum.
- Cholera: Cholera is spread via contaminated food and water, and poor hygiene.
- Measles: This disease is spread through inhaling sputum.
Insurance
Climbing a mountain as high as Kilimanjaro does have dangers. You should ensure that you have good insurance to cover these risks. It is a condition of booking to climb Kilimanjaro that you have medical and accident insurance.
Your insurance must cover helicopter evacuation if it becomes necessary. It should also cover the costs of getting home should you miss your scheduled flight due to accident, injury, illness or simple bad luck.
Your insurance must specifically include cover you to climb up to 6000m.
Your insurance should also protect against the standard travel dangers, including: baggage delay, loss of personal items etc.
We recommend the global supplier of travel insurance, World Nomads. Make sure to add 'hiking up to 6,000m' on check out and be sure to read the small print carefully for any policy you are considering. Different policies provide different levels of cover, so make sure you understand what is and is not included in your policy.
Sorry but we are not insurance experts so we do not review policies.
Health
Malaria and Mosquitoes
The entire Kilimanjaro region is the home of malaria-carrying mosquitoes, and you are at risk of contracting malaria at least until you climb above 3000 metres. Above that, mosquitoes can not survive. A bout of malaria can ruin your entire trip and end your climb early, so it is best to protect yourself.
Your doctor can prescribe anti-malarial medications, but we also recommend wearing long sleeves and trousers, as well as using a good mosquito repellent that contains DEET the entire time you are below 3000 metres.
Avoiding diarrhoea
Make sure that your hygiene is as good as possible to avoid picking up a stomach upset. Needless to say, a bout of diarrhoea can make a week-long strenuous ascent unpleasant or even impossible.
On the climb itself, we make sure that your food is pure and uncontaminated, and that all of your water is treated with WaterGuard purification tablets. Before your trek, though, you will have to protect yourself.
Make sure you follow these simple rules at all times:
If you are not absolutely certain water is pure, do not drink it.
Wash your hands thoroughly after using the toilet, and before eating or handling food of any kind.
Do not eat raw vegetables or salads. Cooked, preferably boiled veggies only.
Avoid any cold drinks, and ice of any kind.
Water from sealed bottles is generally fine, as are fizzy drinks, wine and beer. Hot tea and coffee are good, as they have just been boiled.
If you do get diarrhoea, the most important thing you can do is to stay hydrated. The best thing to drink is a rehydration solution like Dioralyte. Read more about dehydration below.
Over the counter medicines like Immodium (or anything containing loperamide) are only for short term, mild diarrhoea. Some doctors recommend taking a single, 500mg dose of Ciprofxin, or any ciprofloxacin antibiotic in an emergency situation. This is a prescription medicine, and you should discuss it with your doctor before your trip.
Preventing dehydration
Even if you avoid diarrhoea, you can easily become dehydrated at high altitudes. The lower air pressure forces you to breathe more quickly and deeply, and you lose a lot of water through your lungs. You will also be exerting yourself, and sweating.
The upshot is, as you might expect, that you will have to drink more water. You need to drink at least 3 litres of fluids every day while climbing. Even when you don't feel thirsty you have to drink this amount as a minimum - preferably more. This is particularly important on the final day when you attempt the summit and could mean the difference between success or failure.
On summit night you should drink at least half a litre (preferably a whole litre) before you set off. We will also supply you with 2 litres of water to fill your own water bottles or hydration bladder. Make sure it does not freeze! Wrapping the bottles in thick socks or otherwise insulating them is usually enough.
Stay on the look-out for signs of dehydration in yourself and your fellow climbers. The most common symptoms include thirst, dry lips, nose or mouth, headache and feeling fatigued or lethargic. If you think you may be dehydrated, there are two ways to tell:
The colour of your urine. Clear or light straw-coloured urine means you are probably not dehydrated. Yellow or orange wee means you have not been drinking enough, and you need to up your fluid intake quickly.
Pinch or press firmly on an area of exposed skin. If it does not spring back instantly, or stays pale and bloodless for more than a second or two, you are probably dehydrated.
Remember to keep drinking on the way down the mountain, as well.
Sunburn and UV Protection
While a high climb is hardly a day at the seaside, you will be vulnerable to sunburn if not properly protected. The thin atmosphere at high altitudes blocks much less UV radiation, even on cloudy days.
The three most important things you can do to avoid sunburn are:
Apply SPF 30 or higher sunscreen to your face, nose and ears at least 30 minutes before going out into the sun, and reapply regularly. High SPF lip balm is also a must.
Wear a wide-brimmed hat that shades your face, nose and ears.
Wear UV-protective sunglasses, category 2-4.
At higher altitudes the sun's rays are intensified and even on a cloudy day they can penetrate through and still burn you. And do not forget that the sun is at its strongest between 10:00-14:00 hours each day.
Eating well
Many climbers experience loss of appetite at high altitudes. This is a real problem, as you will be burning an extra 2000 or more calories a day, and not replacing them can cause real problems, especially when you attempt the summit.
Just like staying hydrated, you have to eat heartily even if you are not hungry. Meals heavy in carbohydrates are best, because they are easier to digest at high altitudes and provide long-term energy.
The summit ascent is different. You will not have a big, heavy meal which might slow you down on the most intensive part of the climb, but rather a light snack and a hot drink. It is important to keep plenty of small snacks with you on this leg, as you will have to keep your energy levels high. Also, make sure they do not freeze – so keep them in pockets underneath your jacket, or in an insulated bag like your daypack.
Summit snacks should be chosen carefully. Take a favourite treat to make it easier to eat when you do not feel hungry, but avoid anything with honey or syrup, or anything chewy as they are likely to freeze tooth-crackingly solid above 5000 metres. Chocolate, nuts and seeds, biscuits, savoury snacks and boiled sweets are generally better choices.
Body temperature
Every mountain has its own climate, and Kilimanjaro has several different weather zones at different heights and on different faces of the mountain. Conditions change quickly, and you will be moving between zones as well. A hot and dry day can be followed immediately by snow or rain. Wearing a layered outfit is generally the wisest way to make sure you stay healthy and reasonably comfortable in all conditions.
Above all, make sure to wear warm, wind-and water-proof, breathable clothing on your climb. Get high quality gear too, as this is definitely the real thing. Storms, high winds and freezing temperatures must be expected, and poor quality equipment will fail.
Altitude Sickness
Altitude sickness, also called Acute Mountain Sickness (AMS), hypobaropathy and soroche, is an illness caused by exposure to the low air pressure, especially low partial pressure of oxygen, which many climbers experience at high altitudes.
AMS is caused by exerting yourself at high altitudes, especially if you have not been properly acclimatised. It is most common at altitudes above 2400 metres. Kilimanjaro is nearly 6000m above sea level. At this height, the air pressure (and the amount of oxygen it contains) is less than half that at sea level, and has been said to be comparable to working with only one lung.
AMS can be serious, especially as it can be debilitating, and it generally occurs far from places where medical treatment can be easily administered.
Not everyone suffers from AMS, of course, and it is very difficult to predict who is or is not vulnerable to it. Generally speaking, a fit person is less vulnerable than an unfit person, because their cardiovascular system can operate at low pressures longer without as much strain. Even so, anyone can be vulnerable at altitudes above 3500 metres, no matter their fitness level, if they have not spent some time getting used to the low atmospheric pressures first.
Avoiding Altitude Sickness
1. Walk high, sleep low. It is best to gradually climb higher each day, then descend lower to sleep. This lets you gradually become accustomed to lower pressures, and then recover somewhat overnight.
2. Slow and steady. You need to keep your respiration rate low enough to maintain a normal conversation. If you are panting or breathing hard, you must slow down. Overworking your heart and lungs substantially increases your chance of becoming ill.
3. Drink much more water than you think you need. Proper hydration helps acclimatisation dramatically. You need to drink at least three litres each day. As dehydration presents many of the same symptoms as altitude sickness, your chances of being allowed to continue are best if you stay hydrated.
4. Diamox. The general consensus of the research is that Diamox is helpful in avoiding AMS. We use it when climbing Kilimanjaro. We recommend you google Diamox and its effects yourself. It is a prescription drug, and you should consult with your doctor before taking it.
Medication
Your guide carries a first aid kit at all times but we recommend you carry the following items: - Painkillers - Anti-inflammatory tablets/gel - Second Skin Elastoplast (to prevent blisters)/ bandages - Sunscreen for lips and skin - After sun cream (for sunburn) - Any personal medication
-
Equipment Supplied by Peak Expeditions
3-man tent per two people
Mattresses
Dining tent including tables chairs and eating utensils
A toilet for the private use of your group
Rental Equipment
If you’ve decided to rent gear, then this link is a list of equipment available. Just let our team know what you’d like to hire at your Pre-Climb Briefing. All payments are made locally in US Dollars (cash only).
These items must be packed in your main equipment bag. They should not be attached to the outside, as we are not responsible if items fall off when the bags are being carried up the mountain. The sleeping bags weigh approximately 2.6kg each
Clothing to Bring
View our equipment recommendations
Headgear
Warm beanie style hat – knitted or fleece
Neck gaiter or scarf. It can get dusty on the upper reaches and a scarf or balaclava comes in handy!
Sun hat – preferably wide-brimmed for protection
Sunglasses – high UV protection
Upper Body
Thermal or fleece base layer (x1)
Long sleeve shirt/tshirt – light or medium weight, moisture wicking (x 2)
Short sleeved shirt/tshirt – lightweight, moisture wicking (x2)
Fleece or soft shell jacket (x1)
Insulated jacket – down or primaloft
Lightweight water/windproof hard shell outer jacket
Poncho – if trekking close to the rainy season
Gloves – lightweight, fleece or quick drying fabric
Gloves or mittens – heavyweight, insulated, preferably water resistant
Legs
Leggings – thermal or fleece base layer (x1)
Trekking trousers – light or medium weight (x2) – convertible trousers work well
Waterproof hard shell trousers – ski pants work fine
Gaiters – optional but it can be muddy in the rainforest and dusty higher up
Feet
Trekking boots – mid weight with good ankle support
Training shoe or similar – to wear around camp
Mid-weight trekking socks (x5 pairs)
Breathable, high-wicking liner socks (x3 pairs)
Thermal trekking socks for summit night (x1 pair)
Equipment to Bring
View our equipment recommendations
Small Rucksack or Daypack (30-40 litres) to carry water and personal items
Waterproof duffle bag (approx 80-100 litres) – max weight when full should be 15kg. This weight restriction includes your sleeping bag, whether you brought one with you or rented one from us. Your duffle will be carried by your porter
Sleeping bag (4 season or -20 Deg C) and compression sack
Insulated sleeping mat (optional) – we provide a comfortable foam mattress but many people like the additional comfort and warmth of a Thermarest sleeping mat
Trekking poles
Water bottle or hydration bag – must be able to carry 3.0L of water. Wide-mouthed bottle (minimum 1.0L) is required for summit night
Headlamp (plus extra batteries)
OTHER ACCESSORIES
Sunscreen and lip balm - high SPF
Toiletries, including wet wipes and hand sanitiser – please carry all rubbish back off the mountain
Camera and spare batteries
Personal medication and first aid kit
Personal snacks and energy bars – dried fruit and nuts are also a good source of energy
Isotonic drink powder / energy drink powder to mix in with your water. This improves flavour and helps replace electrolytes
Microfibre towel for wiping hands and face each day
Ear plugs, if you are a light sleeper
Pee bottle, if you prefer not leaving the tent at night
Dry bag (only required if your main duffle bag is not waterproof)
Join One Of Our Ready-To-Book Tours On The Umbwe Route?
Join one of our scheduled departures and create memories with new people as we make our ascent to the top of Kilimanjaro!
Plan Your Own Hike To The Top Of Kilimanjaro?
Request your once-in-a-lifetime personalized Kilimanjaro adventure! fill out the form below, and our team will respond within 48 hours. If you’d like to add details to your enquiry in the meantime, please email us at info@peak-expeditions-tanzania.com.
Related Tours


